Ethernet ghosting & NAC bypass – A practical overview
Ethernet ghosting & NAC bypass – A practical overview
Introduction
Even when provided with direct physical access to the network (client hands you a LAN cable), some security assessments may often require careful consideration before actually plugging in.
Maybe you’d prefer not having the SOC team detect you as soon as you connect your untrusted laptop into the network. Or maybe some 802.1X or other network access control requires authentication before you’re even allowed on the LAN.
Whatever the reason, hiding your identity on the network at the Ethernet level presents significant benefits during internal security assessments.
One practical way to achieve this is through a technique we like to call “Ethernet Ghosting”, where a legitimate device on the network is used as a mask to disguise communications from the attacker device.
This is accomplished by disguising packets from the attacker device and merging them with those from the legitimate device over a single shared physical link. From the points of view of the upstream switch and network, only one device is present – a single physical cable is carrying packets for a single MAC address.
The tricky part generally resides in merging the traffic of two devices using the same MAC address over a single link. Typical network switches have a difficult time dealing with this rather unusual (and somewhat out of spec) setup.
How we do it
Here at immunIT, we use specialized switches which are specifically designed to accomplish this sort of task. Specifically, these switches can be configured on the fly to re-direct traffic from any port to any port without interfering with normal network access.
The switch in question is the Skunk, made by Ringtail Security (one of my personal side projects) and allows re-configuring network flows through its USB command-line interface.
Here’s the idea: we will first use the Skunk to sniff packets from the legitimate device in order to obtain its MAC address (this step can be skipped if the MAC address is readily available). Once we know the MAC address of the legitimate device, we can duplicate it on our “ghost” device and then reconfigure the Skunk to merge the traffic from both together.
Wiring
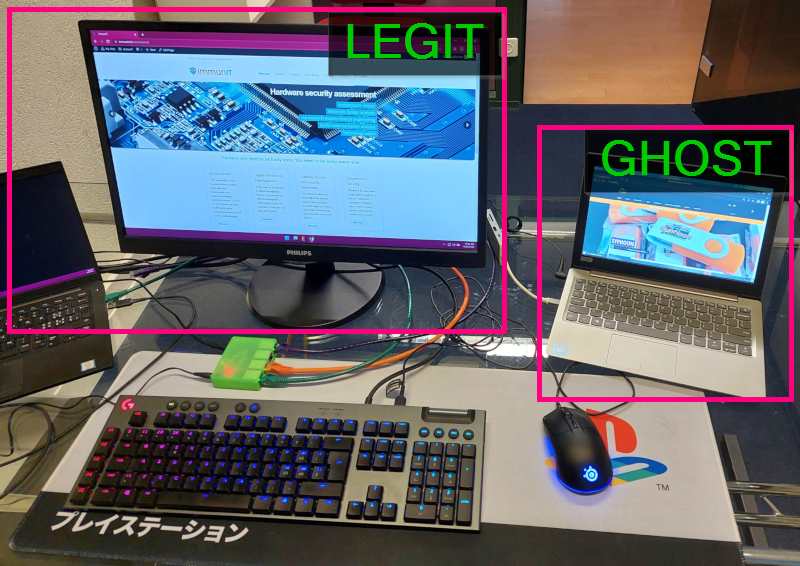
Our Skunk will be connected to three points which are the legitimate device (“legit”), the attack device (“ghost”) and the upstream network. Do not actually connect the “ghost” device just yet however! First, we’ll need to configure the switch to avoid leaking some unwanted packets onto the network. For this example, we’ll use the following setup:
- Port 0: legit
- Port 1: ghost (don’t connect just yet!)
- Port 3: upstream
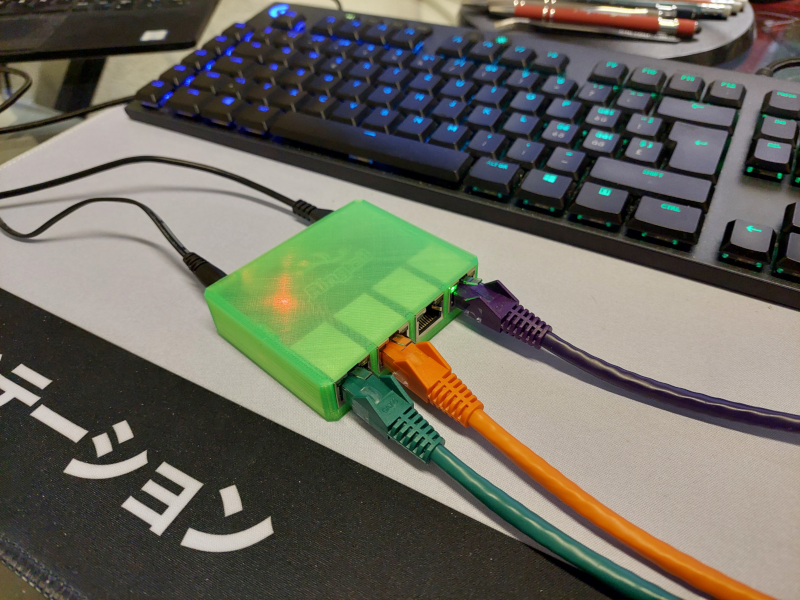
In the picture above, you can see we have connected only the upstream network for now. Let’s get on with the switch configuration.
Getting the “legit” MAC
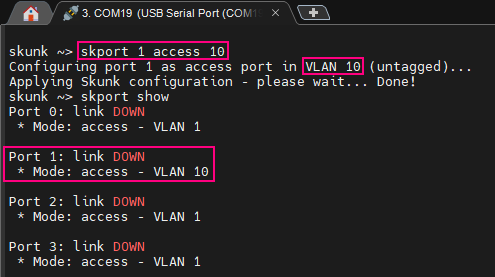
Before we connect the “ghost” device, we need to configure the Skunk to have different VLANs for the “legit” and “ghost” ports. The upstream port should be on the same VLAN as “legit”. This will ensure our “ghost” device is unseen on the network until the setup is fully complete.
This is done using the following command:
skport 1 access 10
Let’s fire up a terminal (we generally use Putty or MobaXTerm) and connect the USB cable from the Skunk to our computer.
As explained in the Skunk User Guide, the interface operates at 19200 baud. Let’s open a session on the associated serial port using this baudrate and enter the command above.
From here, we can now safely connect our ghost device to the Skunk (orange cable on port 1 in this example). Then, we configure the Skunk to mirror outbound packets (sniff_rx) from “legit” to “ghost” (sniff_out) using the following commands:
skport 0 sniff_rx
skport 1 sniff_out
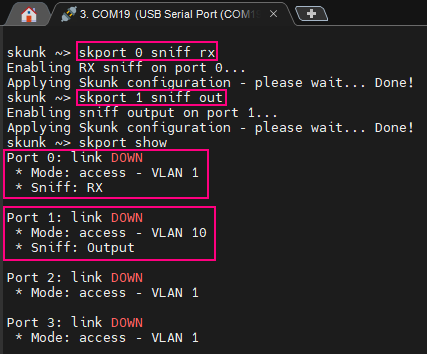
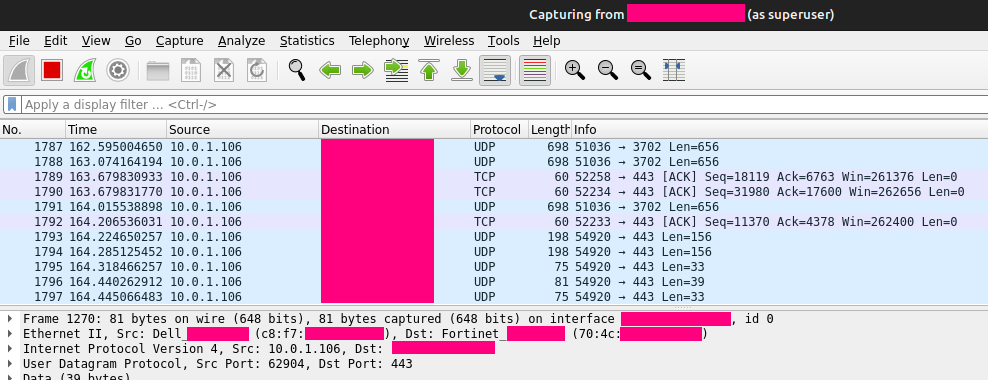
With a simple packet capture tool like Wireshark or TCPdump running on the ghost device, we can discover the legit MAC address from the packets being sniffed.
Ghosting time
Now comes the fun part. We configure our ghost device to use the same MAC address as the legit device (which we just obtained in the previous step). Changing the MAC address on an Ethernet adapter can be done in various ways depending on the exact situation.
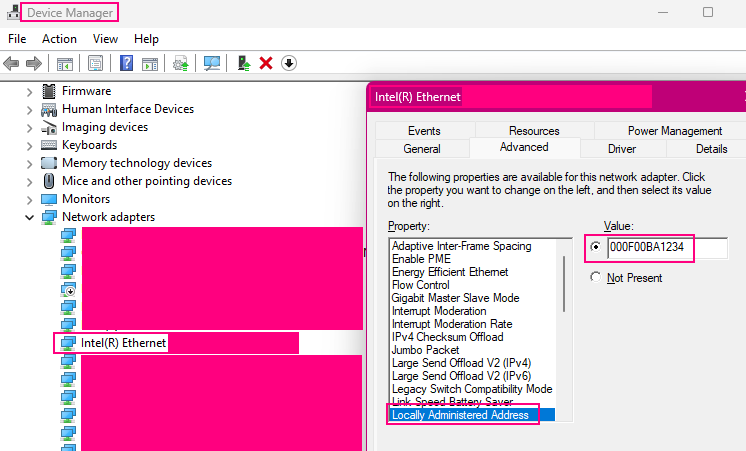
On Windows, some network adapters provide an advanced configuration option to override the MAC address.
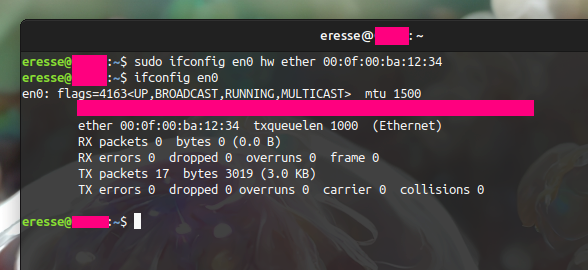
On Linux, various methods can be used but a simple classic is through the ifconfig utility (“ifconfig NAME hw ether MAC_ADDR”).
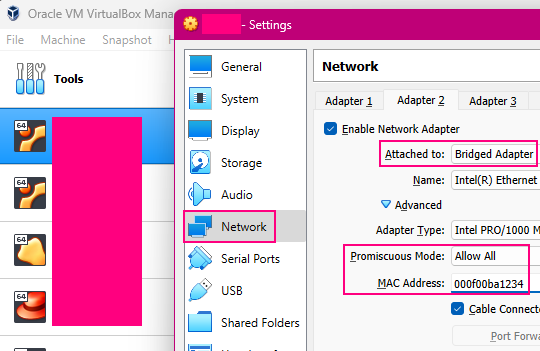
When running a VM, this can also be done at the hypervisor level. For example, in VirtualBox the configuration of a bridged adapter can be set to use any MAC address.
With our ghost device now having the same MAC address as legit, we can reconfigure the Skunk to merge traffic from both devices over the single “upstream” link.
To do this, we start by disabling the previous sniffing. Then, we mirror the inbound traffic for legit (port 0) to ghost (port 1). Finally, we bring back the ghost port into the common VLAN shared with legit and upstream:
skport 0 sniff_tx
skport 1 sniff_out
skport 1 access 1
From here, both legit and ghost now have a functioning access to the network, sharing the same MAC address and physical link. The ghost device is now effectively invisible on the network.
All done! The ghost device can now access the network under the cover of the legit device. Since the legit still has normal network access, most NAC solutions including 802.1x will continue to function transparently, keeping the upstream switchport active. However, please take some time to look at the notes below. They cover important additional information relating to the use of this Ethernet ghosting technique. If you start experiencing some issues on the legit device in particular, the “TCP compliance and RST flag” section might provide some help.
Side notes
Don’t connect ghost too soon!
When preparing the setup for Ethernet ghosting, it’s important to keep in mind that until we reach the final steps (ghost has the same MAC as legit), connecting our “untrusted” device to the network risks triggering a detection event and causing the upstream switchport to shutdown. This is why we recommend starting out by assigning the Skunk ghost port to a different VLAN before connecting the ghost device. Then, once the ghost MAC is set to the same value as legit, we can bring the ghost port back into the main VLAN, as explained in the last step of the process (“skport 1 access 1“).
Silence your device
Even with Ethernet ghosting successfully setup, an IDS or the SOC may still detect you if your device is constantly spitting out packets revealing your identity. One common example is the device hostname being exposed over local name resolution protocols such as WINS / NBNS (NetBIOS Name Service).
Before setting all of this up, take a minute to think about (or even verify with a packet analyzer) what your device is leaking onto the network. Ensure all unnecessary services are disabled and the hostname is not exposed if you wish to reduce your footprint.
TCP compliance and RST flag
Some operating systems (including Linux) implement the TCP specification more rigorously than others (Windows for example). Whenever an incoming TCP packet cannot be matched to a known socket, the system will attempt to close the TCP stream at the other end by sending an RST signal.
In our setup where packets will be shared between legit and ghost, this behavior can lead to the legit device being unable to establish and maintain TCP connections due to the ghost systematically closing them.
Thus, if the ghost device is a Linux system, we need to disable this behavior. One easy way to do this is with an iptables rule to disallow all outbound RST packets:
iptables -A OUTPUT -p tcp –tcp-flags RST RST -j DROP
Be safe and have fun!
Paul Duncan
Comments are closed.